/
Configuring MS Windows 10
Configuring MS Windows 10
- Support
Owned by Support
May 24, 2018
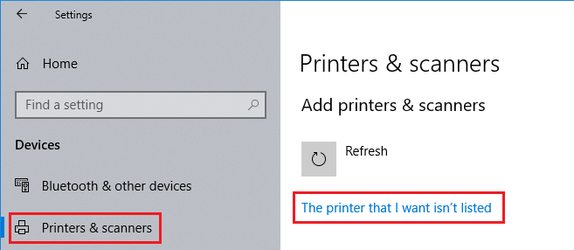
- In the Windows Settings, select 'Devices - Printers & scanners'.
- Select 'Add a Printer or scanner' and waiting for a while, click 'The printer that I want isn't listed'.
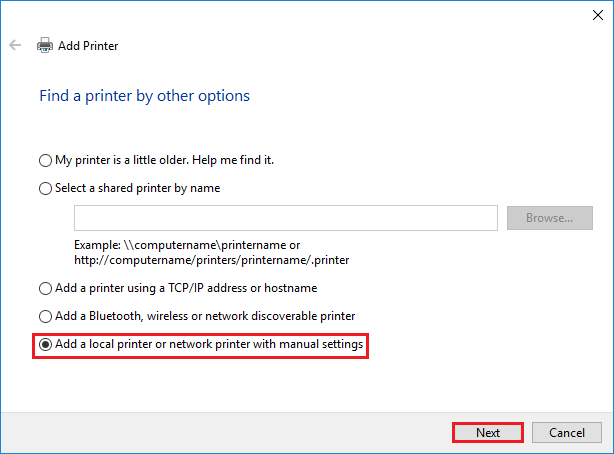
- In the Add Printer dialog, Select 'Add a local printer or network printer with manual settings' and then click Next.
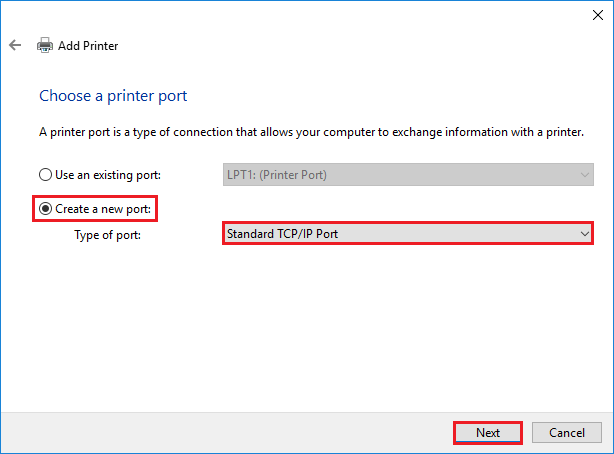
- In the Choose a printer port dialog, Choose 'Create a new port - Standard TCP/IP Port' and click 'Next'.
- In the Type a printer hostname or IP address, Enter the printer host name or IP address.
To manually select a driver, uncheck the 'Query the printer and automatically select the driver to use' checkbox.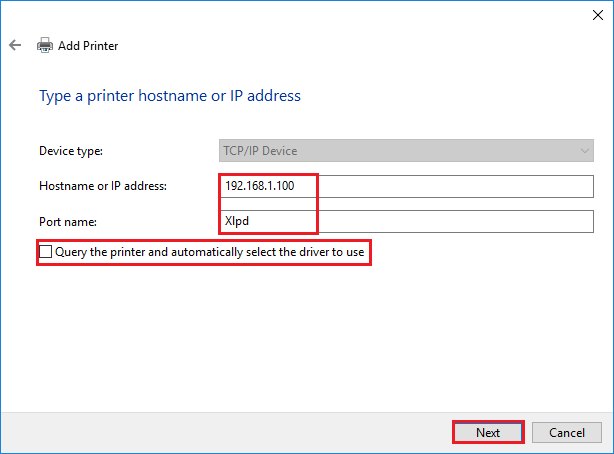
- Hostname or IP address: Enter the name or IP address of the PC where Xlpd is installed.
- Port name: Enter a unique name. You can use the name that is automatically generated when you enter the printer name above.
- In Additional port information required dialog, Select 'Custom' and click the 'Settings'.
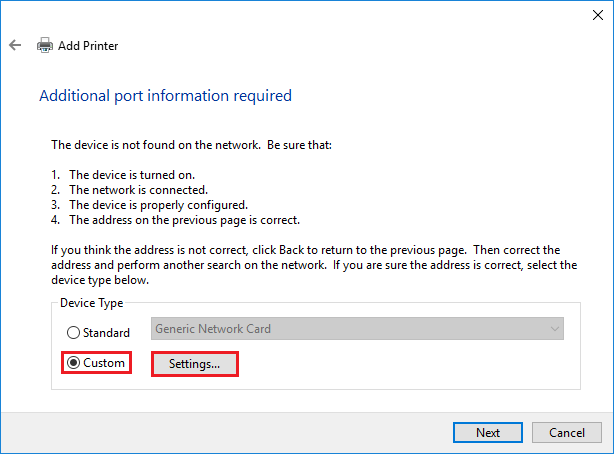
- A Configure Standard TCP/IP Port Monitor dialog box opens.
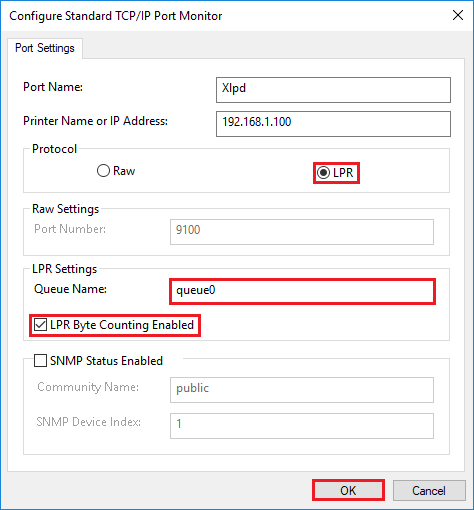
- In the Protocol area, select LPR.
- In the Queue Name box, enter the queue name of Xlpd. If this name is not already registered in Xlpd and a print job is sent to Xlpd using this queue, then Xlpd will print the job using its default queue or create a new queue automatically depending on the Xlpd settings.
- Select the LPR Byte Counting Enabled check box.
- Clear the SNMP Status Enabled check box.
- In the dialog box above, click 'Next' to finish the Additional port information required dialog.
- Follow the instructions on the additional steps for further configuration.
Related content
Configuring MS Windows 2000/XP/2003/Vista/7/8/8.1
Configuring MS Windows 2000/XP/2003/Vista/7/8/8.1
More like this
Windows 2000_XP_2003_Vista_7 Printer Setup
Windows 2000_XP_2003_Vista_7 Printer Setup
More like this
Windows 2000_XP_2003_Vista_7 Printer Setup
Windows 2000_XP_2003_Vista_7 Printer Setup
More like this
Change Printer
Change Printer
More like this
Change Printer
Change Printer
More like this
General Setup
General Setup
More like this