How to use an Xmanger 7 Classic passive session
- Netsarang Support
- NetSarang Support
PROBLEM DESCRIPTION or QUESTION
RESOLUTION
Contents
How to make an Xmanager Classic passive session file
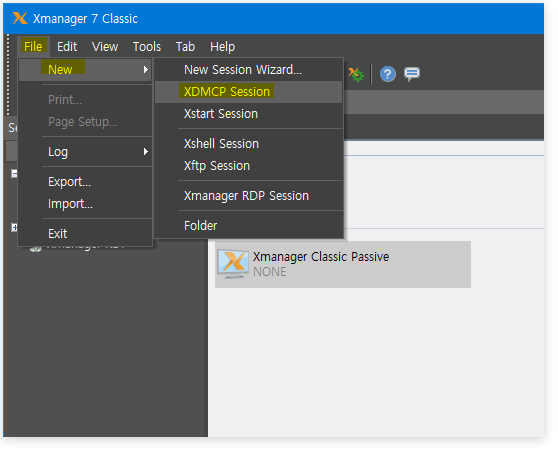
- Open Xmanager 7 Classic and launch a new XDMCP Session dialog.
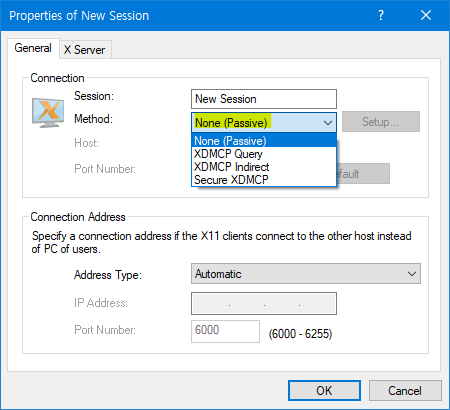
- In the New Session properties dialog, select 'None (Passive)' as the Connection Method. Give the new session a name and save it.
- Run the session file.
- You will find Xmanager Classic running in the background.
Note: The X server name is Xmanager 7 while the new Xmanager 7's name is Xmanager Server 7.0.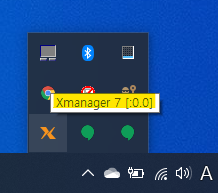
You need to remember the DISPLAY number. In this example case, it is 0.0. - Run the X application.
How to use the Xmanager Classic passive session
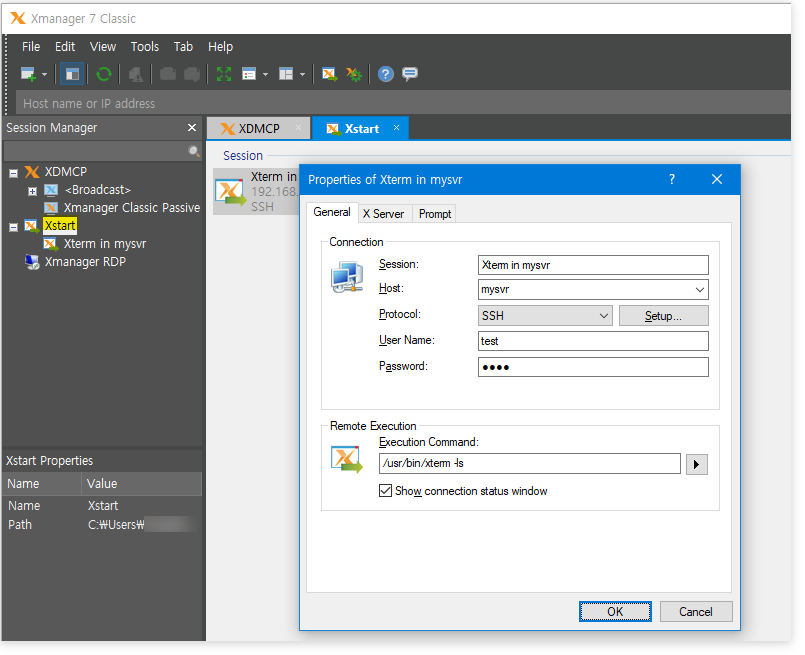
Using SSH's X11 forwarding in Xshell
When you're connecting to a server using SSH with the X11 forwarding option, you can run any X11 application using Xmanager easily and with no network restrictions.
- Run an Xmanager Classic passive session.
- You need to know the DISPLAY number from the system tray area where the Xmanager passive session's icon can be seen.
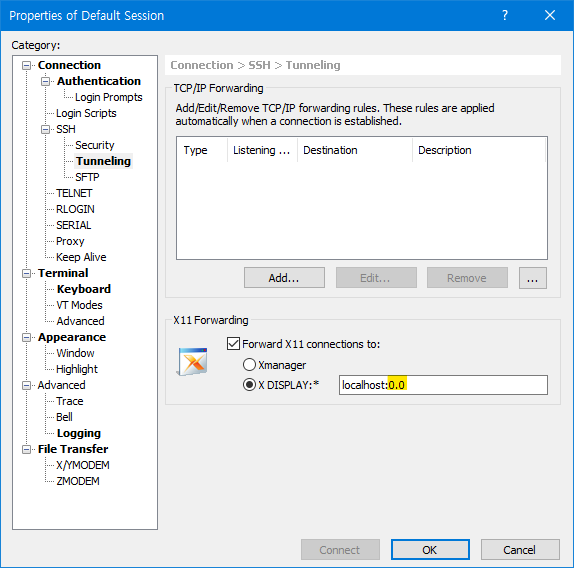
In this case, it is 0.0. Remember this number. - In the Xshell's session properties, configure X11 connections to be forwarded to the X DISPLAY and set its value to localhost:[DISPLAY number]. Usually, the [DISPLAY number] is 0.0, but this is not always the case. The number must be the same value from step 2 above.
If you want to use the new Xmanager 7 and not Xmanager 7 Classic, you can configure X11 connections to be forwarded to Xmanager. This is convenient because you don't need to launch an Xmanager passive session yourself. Instead, Xshell will automatically launch an Xmanager passive session and set the proper DISPLAY number. We have plans to allow users to select either the new Xmanager 7 server or Xmanager 7 Classic in the near future. - Run the desired X application.
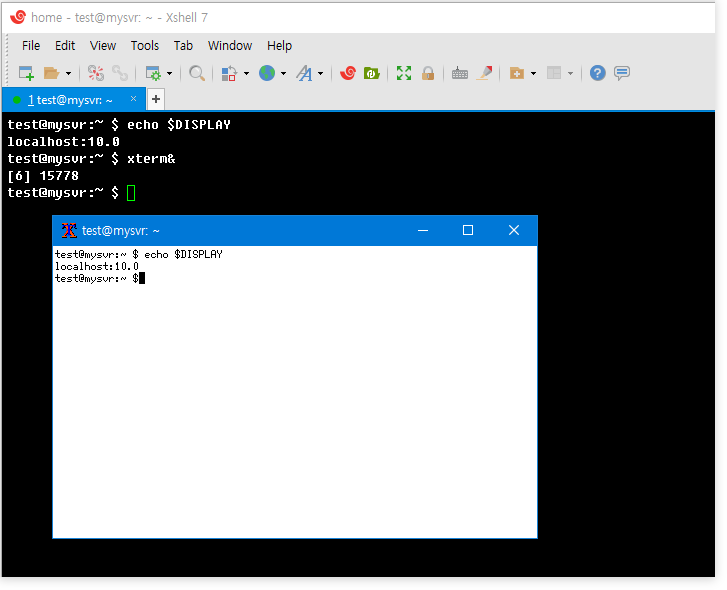
In the above image, the X connection was forwarded from localhost:10.0 to Xmanager's [0.0]
Using a plain TCP connection for TELNET connections
Instead of an X11 forwarding connection, if you're using a plain TCP connection such as TELNET or RLOGIN, an SSH connection without X11 forwarding can be utilized. In this case, the network connection from the server to you PC should be established.
- Run an Xmanager Classic passive session.
- You need to know the DISPLAY number from the system tray area where the Xmanager passive session's icon can be seen.
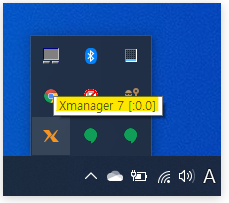
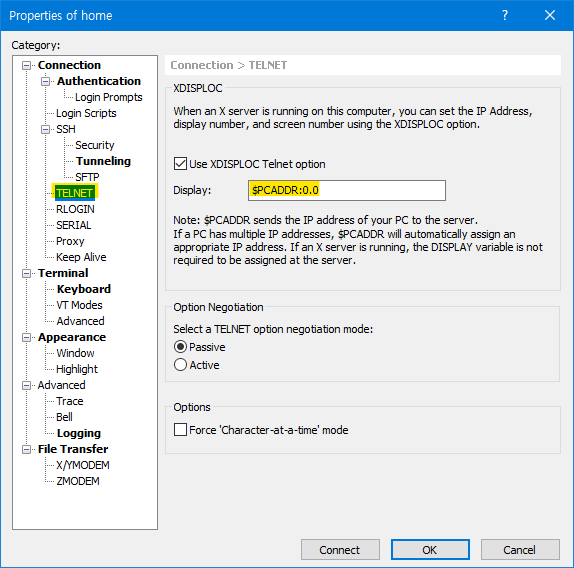
In this case, it is 0.0. Remember this number. - Make a TELNET connection. You will see that the DISPLAY is not set.(①)
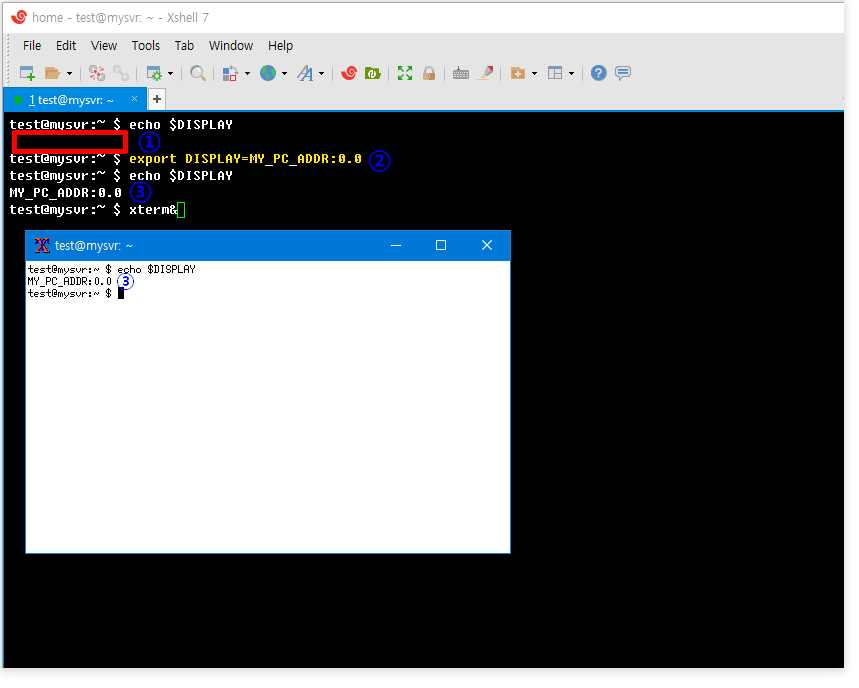
- You need to set the DISPLAY variable manually. ②
- Run the desired X application and check the DISPLAY variable.(③)
How to create a shortcut for an Xmanger Classic Passive session
(This section is no longer meaningful if you're using Xmanager 7 Build 0056(Jan 29, 2021) and over.)
- Create an Xmanager Classic session in Xmangar Classic.
- Create a shortcut of the session in the context menu:
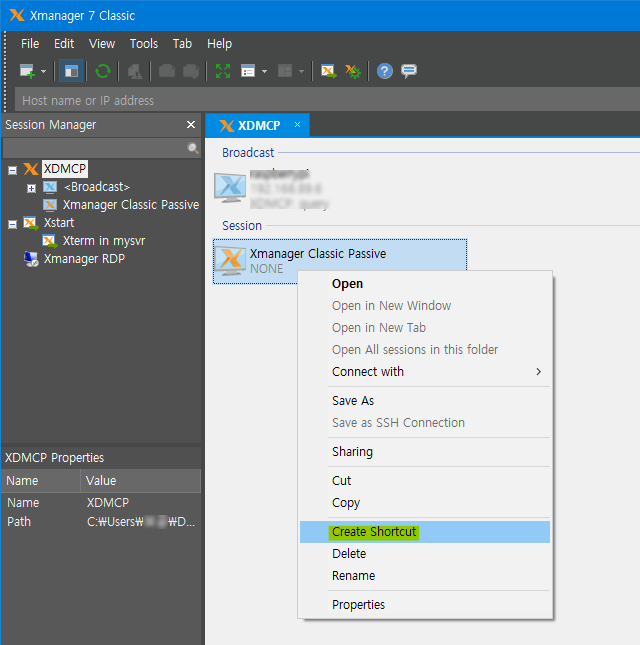
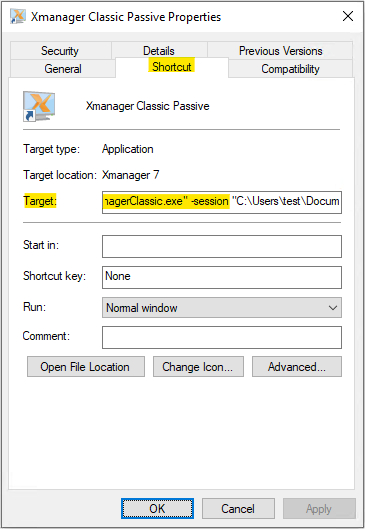
- Open the shortcut file's properties and insert the Xmanager Classic binary path before the session file name with the '-session' parameter like the following:
"C:\Users\USER_NAME\Documents\NetSarang Computer\7\Xmanager\Sessions\Xmanager\Xmanager Classic Passive.xdts"
=>
"C:\Program Files (x86)\NetSarang\Xmanager 7\XmanagerClassic.exe" -session "C:\Users\ USER_NAME\Documents\NetSarang Computer\7\Xmanager\Sessions\Xmanager\Xmanager Classic Passive.xdts"
Xmanager Tip: In all passive connections, it is recommended that you use an Xstart session. An Xstart session can automatically connect X applications to Xmanager.
Xshell Tip: Setting the DISPLAY variable is not necessary even in a TELNET session. Xshell can set the DISPLAY variable automatically with the following option:
How to create an Xstart session using Xmanger Classic
First, update your Xmanage 7 to the latest build.
Click the Advanced button in the Xstart dialog window.
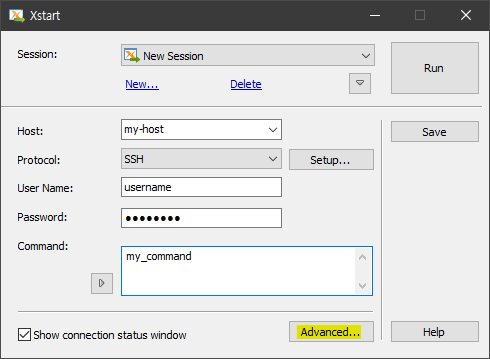
Select Use the Classic X server.
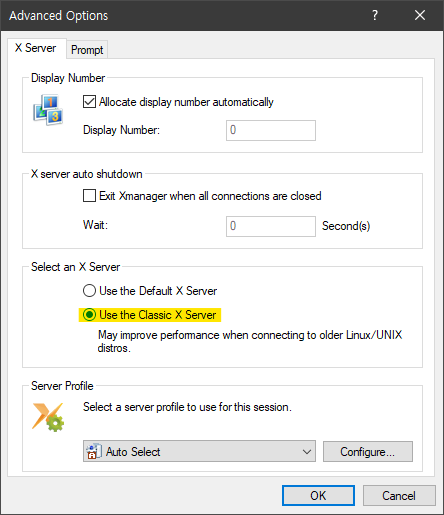
Click OK to save options.
Run the Xstart session and check if Xmanager Classic is running in the System notification area.
The Xmanager Classic server is displayed as Xmanager, while Xmanager's Default server is displayed as Xmanager Server.