Since Xmanager is an X server, the remote X applications such as CDE, KDE and Gnome must be able to connect back to your PC. This makes it difficult to use XDMCP connection if your PC is in a private network.
However, you can still run your remote desktop session through SSH tunnel. There are two steps:
- Creating an SSH tunnel in Xshell.
- Creating an XDMCP session that uses SSH tunnel.
...
| SSH server | Config file | Setup |
| OpenSSH | /etc/ssh/sshd_config | X11Forwarding yes |
| SSH.COM | /etc/ssh2/sshd2_config | AllowX11Forwarding yes |
After setting the value, restart SSH daemon.
Step 1. Creating an SSH tunnel in Xshell
Open Xshell.
Info title Note For more information about Xshell, please refer to our Xshell product page.
- If the Sessions dialog box does not automatically opens up, click Open on the Flie menu.
In the Sessions dialog box, right click on the session that connects to your remote host, and then click Properties.
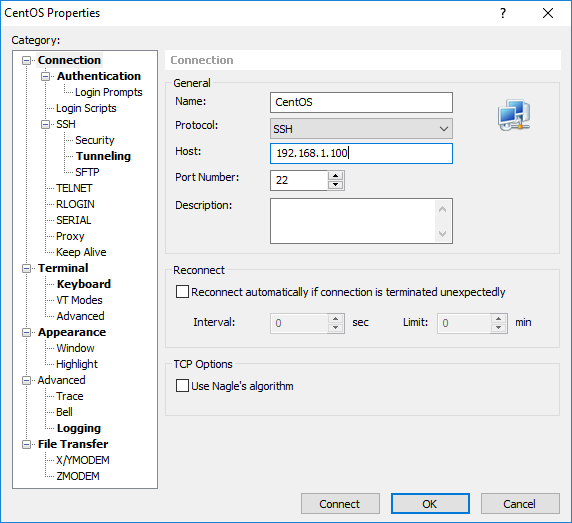
- In the Category menu, Click Tunneling.
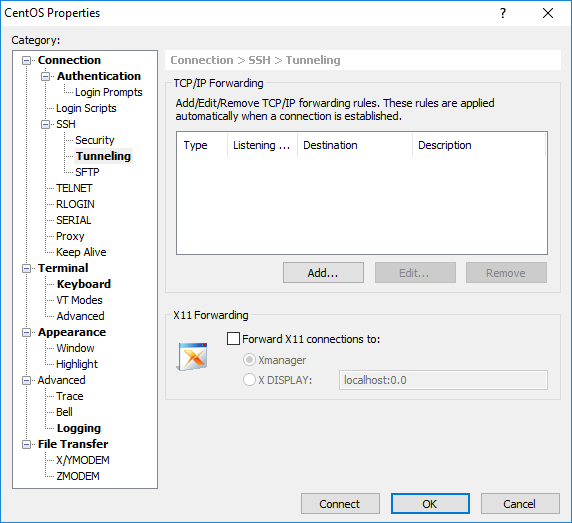
- In the TCP/IP Forwarding section, click Add.
RESULT: Forwarding Rule dialog box opens.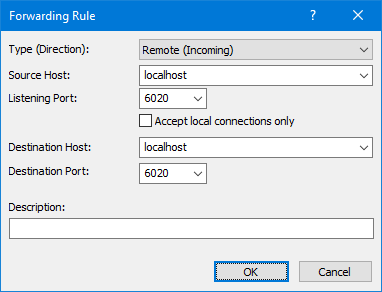
- In the Type list, select Incoming (from remote to local).
- For Source Host, enter the "localhost".
- In the Listen Port field, enter "6020".
Note: You can choose any number that is not in use. - In the Destination Host field, enter "localhost".
- In the Destination Port field, enter "6020".
Note: To get the Xamanger display number, subtract 6000 from the Destination Port number. In this example, the local display number is 20. We recommend using a number between 6020 and 6255. - Click OK to save the changes.
Now, you are ready to create a secure SSH tunnel for XDMCP connection. Open the session and go to the next step in Xmanager.
Step 2. Creating an XDMCP session that uses SSH tunnel
- Open Xmanager.
- In the Tools menu, click Options.
RESULT: Options dialog box opens.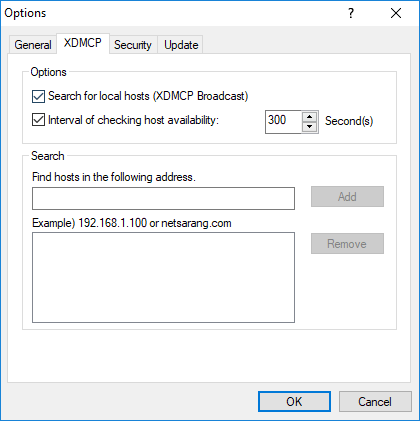
- In the New Address, enter the IP address of the remote host, and then click Add.
- Click OK to save the change. Now you should see a dynamic session icon of the remote host on Xmanager.
.png?version=1&modificationDate=1628569644439&cacheVersion=1&api=v2&width=561)
.PNG?version=1&modificationDate=1628576111027&cacheVersion=1&api=v2&width=585)
- Right click on the remote host icon.
- In the context menu, click Save As.
- Right click on the new session and click Properties.
RESULT: Properties dialog box opens.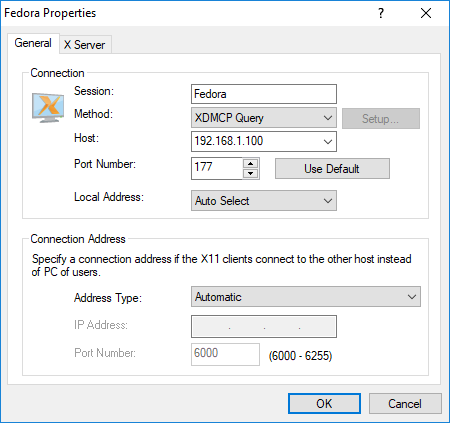
- In the Proxy section, select Use following connection address.
- In the Host box, enter "0.0.0.0".
in the Port Number box, enter "6020".
Info title Note If you did not use 6020 for the Listening Port as above 1. Creating an SSH tunnel in Xshell, use the number you have used instead.
- Click the X Server tab.

- Clear Allocate display number automatically.
In the Display Number box, enter "20".
Info title Note If you did not use 6020 for the Destination Port as above 1. Creating an SSH tunnel in Xshell, use the last 3 digits of that number. For example, enter 230 if you used 6230 for the Destination Port.
- Click OK to save the change.
- Double click on the session you have just created.